Monday, January 27, 2014

Stay at Home Anniversary Part 1

This will be a three part blog about Jamie and I's at home anniversary. Tomorrow is our two year wedding anniversary and 5 years that we have been together! We celebrated while we were in Vegas with a fancy dinner out but I couldn't just let the real day go by unnoticed! I love to cook nice meals at home and have a candlelight meal and make it feel special!! 

So that was my goal today! We were having our meal a night early because Jamie was headed out of town tomorrow until the big snow storm was forecasted! But anyway, I want to help you have a fancy dinner at home for just the cost of groceries!!!

Step one: atmosphere and table setting!!!  I always shop World Market for table runners and cloth napkins! Last trip I stumbled upon a huge stack of runners for 40% off. Now I didn't need them but I knew I could always use them in the future. So I bought two full price $29.99 on sale for $14 each. 

Normally our kitchen table is a catch all for mail my purse and the dog leash so I love when it looks like this:
Here is the place setting:
I love these monogrammed napkins that were a gift from my mother in law. Wicker chargers from Pier 1, square glass plates from World Market and gold sequined napkin rings from Pier 1. All things I have collected over the years and all on sale!
My candle holders are part of my thanksgiving tablescape and they came from Kirklands. 

This is simple and makes a huge difference to a meal. After we ate, I just added two more chargers And my table looks great sans the purse, mail and dog leash.

Moral of the story: if you find it on clearance buy it and a table runner and a charger can put a normal meal over the top. 

Tomorrow: crab cakes!!!

Have fun decorating!

B

Note: someone asked where my table and chairs were from. Table is Ballard designs and chairs are restoration hardware.

Friday, January 24, 2014

Chocolate Chip Cookies

Jamie, my husband, loves to keep me busy in the kitchen! He is my number one fan, my number one motivator and my number one food requester! For this weekends hunting camp trip it was chocolate chip cookies. The exact request was no oats because I am not a horse. And then I asked if I could put in pecans and it was a strong NO! So basic delicious chocolate chip cookies were on my Thursday afternoon/evening agenda! 

A chocolate chip cookie shouldn't be a complicated thing. I mean you do need the the perfect ratio of chips and cookie, the perfect height, the perfect size and it has to be delicious! To me there is no better recipe than the original Toll House recipe! 
So first I will go through the recipe and then I am going to share a little baking mat experiment that I did!

Start with two sticks of butter, 3/4 cup granulated sugar and 3/4 a cup of packed brown sugar and cream on medium in your stand mixer. 
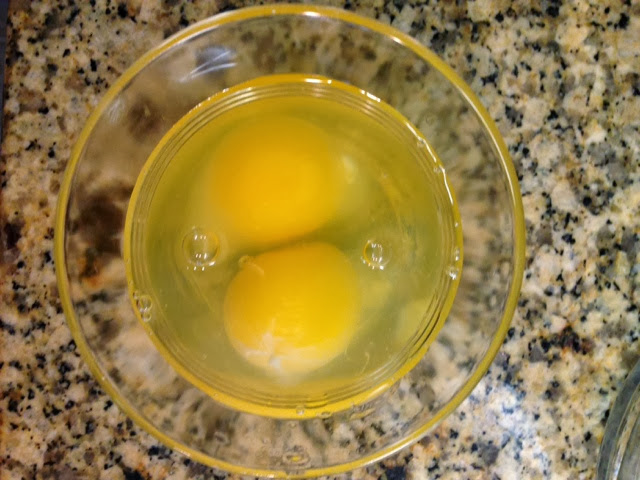
When the sugars and the butter are creamed add two eggs one at a time.
Yummy!!! Smells great already!
Add about a teaspoon of vanilla! Then you will add your dry ingredients. While everything was mixing I combined them in a separate container!
2 1/4 cups AP Flour, 1 teaspoon salt and 1 teaspoon baking soda. Combine and then gradually add to the mixer. Once the flour is incorporated remove the bowl from the mixer and stir in 2 cups of Toll house chocolate chips!
Now this isn't in the recipe! I cover and refrigerate the dough while my oven preheats, atleast for 20 minutes.

During this time I thought, I need three half sheet pans and I have three different non stick baking options so let's see what the best one is.
Here are the three options. Parchment, my Pampered Chef baking mat and my silpat.

After the dough was chilled, I used my medium scoop to place 6 cookies on each sheet. I baked at 375 degrees for 12 minutes!

First the SILPAT:
The SILPAT was good, cookies didn't get golden on top, they didn't spread much from my original shape and they browned nicely on the bottom.

Next was the Pampered Chef Baking Mat:
Pampered chef mat was great! The cookies spread, golden on top and golden on the bottoms.

Next Parchment Paper:
Parchment was good, the cookies didn't spread and were slightly golden top and perfect on the bottom.

Here all three together:

Top:

Bottom:

In my opinion, there was not that big of difference in the three baking mats. But the pampered chef cookies spread more so the cookie was slightly larger! The main reason for my experiment is that I am going to a Pampered Chef Party this week and was unsure if I wanted to buy another mat! I will definitely compare the price of the SILPAT and the pampered chef mat.

All in all this recipe is a win, Jamie said it was the best cookie I have ever made and I have to agree. Great cookie!!!

Enjoy

B

Thursday, January 23, 2014

Fake out Take out for under $15

One of our many New Years Resolutions was to save money!! One of the places we spend the most money is the grocery store. I cook sometimes 3 meals a day not to mention snacks and baking experiments. This causes our grocery bill every month to be outrageously high, I think a family of 4 could eat comfortably on what I spend at the grocery store. But, in saving money I am not willing to give up making great food, baking, cutting out processed food, lowering sugar and in general eating healthy! So there are a few tips that I have learned in researching food cost savings that I feel apply to us!

1: Find meat on sale or buy in bulk! I refuse to pay over $2 a pound for chicken. We like beef and beef is expense! I have learned to buy on sale and freeze!!
2: Have a stocked pantry. The recipe I am about to share only cost me $9 at the store yesterday because I had everything but one item in my pantry.
3: Go to multiple stores. I shop Kroger and Publix because let's get real Publix is outrageous on some items for example their rotissiere chicken is $7 and is half the size of the $5 one at Kroger. I don't go to two stores weekly but I do big shopping at Kroger weekly and small trips inbetween I go to Publix. Also our cereal is $3.29 at Kroger but $4.29 at Publix.
4: Buy fresh vegatables from a farmers market or local grower. We use Blooming Colors and the AG market at the university. Also try to make your menu around what is in season.
5: Make a menu! And try to use the same ingredient multiple times in one week. For example if you need 1 cup of chicken broth for a recipe try to use the rest of the container in another recipe that week to avoid waste. When I analyzed my fridge I noticed we have a lot of waste, leftovers, extra stuff and just sometimes I buy too much.

I am going to try these tips for a month and see what happens!!!! The recipe I am going to share with you today is an inexpensive homemade version of A Chinese takeout favorite: Beef and Broccoli! Jamie said it was the best meal I had made in a while and one of his new favorites!! 
Yummy! Here are the ingredients:
I had all of these in my pantry and only had to buy the chuck roast! And this is a slow cooker recipe so you can start it before work! Also I used the Splenda brown sugar blend because Jamie is diabetic but you can use brown sugar if you would like. First you need to make the sauce in the crockpot.
1/2 cup soy sauce, 1 can of Beef Consommé, 1 tablespoon sesame oil, 1/3 cup brown sugar and 2 tablespoons minced garlic. Whisk together and prepare your meat!!
Here is my $18 chuck roast, last minute recipe decision so I couldn't find one on sale! I cut it in half and froze the other half to use later, maybe next week since Jamie loved this!! The. I sliced it very think using a super sharp meat clever.
Then put it in the crock pot and toss I the sauce. Set it in low for four hours!! After the four hours you will need to make a cornstarch slurry to thicken the sauce!! 
Take 4 tablespoons of the cooking liquid and whisk with 2 tablespoons of cornstarch.
Then pour into the crock pot and stir. Also pour in your frozen broccoli, as much or as little as you like.
Stir to combine and then let cook on low for 30 minutes. In the meantime make brown or white rice (with chicken broth for extra flavor). 
Then serve it up! It really was really good and easy. 

Enjoy

B

Wednesday, January 22, 2014

Chicken and Spinach Lasagna!!!

There is nothing I love more than an Italian Meal! On NYE we were treated to an amazing Italian meal by our friends Courtney and Caroline that included a chicken lasagna dish that was amazing! I have never made a lasagna much less a white one, so I set out to find a great recipe and I think I succeeded! This is definitely not a whip up in a hurry kinda meal but is perfect for Sunday supper or a special family dinner or one of my signature dinner delivered!!! So here we go!!!
Start a big pasta pot full of water boiling!!!

First ingredient: store bought rotissiere chicken! Debone the whole thing and put in a bowl.
Then stir in 2 cups of ricotta cheese.
Set this aside and put your lasagna noodles in to boil. I put 12 in, you only need 9 but they always split and break.
Then melt a stick a butter in a large saucepan.
Once the butter is melted add 1 medium chopped onion and 2 minced cloves of garlic. And let it bubble.
Then add 1/2 cup of AP Flour.
Combine and stir constantly for one minute on medium low heat!!! You will then measure out 1 1/2 cup milk and 2 cups chicken broth.
And slowly whisk that into the flour butter mixture.
Now the star:
2 cups of mozzarella and 1/2 cup of Parmesan. Stir this in until melted.
Then add salt, pepper and Italian seasoning to taste.
Stir and remove from the heat. Your lasagna noodles should be done, drain and rinse with cold water!!! Now assembly begins. You will need a 9x13 dish and put 1/4 of the cheese sauce in the bottom to start.
Then 3 noodles
Then all of the chicken and ricotta mixture.
3 more noodles
Add more cheese sauce, Then add 10 oz frozen chopped spinach, thawed and drained.
Then sprinkle with 2 cups of mozzarella and 1/2 cup of Parmesan.
3 or 4 more noodles.
Top with the rest of the sauce and your done. (I forgot that picture). Here is the finished product. I baked it at 350 for 1 hour.
Let sit for a few then cut and serve.
Delicious! Enjoy!

B

Tuesday, January 21, 2014

Recipe Testing


One of the reasons I blog is because I love to try new recipes. This recipe and blog post is proof that not all recipes are written well and a small mistake on the bakers part can cause disaster!!!! Today I decided to try the cover recipe that is on the February 2014 Southern Living! Here it is:
Here is mine:
Now I am a pretty experienced baker!!! So what happened!?!? I will get to that after I tell you about the recipe. I still feel it is a great recipe!!!! It has been around for a long time. They named it lemon lime pound cake but in another cookbook I have it is called 7 UP Pound Cake!!! 

So let's just get to it!!! First you are going to cream 3 sticks of butter in your stand mixer:
Then measure out 3 cups of sugar:
And add gradually all 3 cups to the butter  and cream the mixture for 5 minutes.
This is where I noticed the first problem! The sugar didn't cream into the butter smoothly, it was still gritty. Problem: butter was soft enough when I started.
Next you will add five eggs one at at time.
Then it's time for the lemon. Once the eggs are incorporated you will add the zest of one lemon, 1 teaspoon of lemon extract and 1 teaspoon of vanilla extract.
Now for the dry ingredients. Measure 3 cups of AP flour into a bowl. And measure out 1 cup of 7 UP.
You are going to add 1 cup of flour and then 1/2 cup of the 7 UP. Till both mixtures are gone. Starting and ending with the flour. Mix just enough to combine after each addition!
Then flour and grease your pan. My cake stuck but I can't for the life of my figure out why because I have perfected my pan skills or so I thought.
Add your batter and bake at 350 for 1 hour and 5 minutes. Cover with foil after 50.
Remove from the oven and cool in pan for 15 minutes then turn out onto a cake plate. And this is what I got.
Epic fail. Now as a blog writer this is the point where I normally say "Nope, not posting this!!!" But tonight I thought this is a great example of how all recipes don't work out for everyone!!!! So I said whatever and made the glaze anyway.
2 cups powdered sugar, 1 1/2 tablespoons lemon juice and 1 tablespoon lime juice. Mix until smooth.
Then pour over cake. The glaze was a great consistency.  Not to thick not to thin but it ran off the cake like nobody's business! And the cake was cool not even warm!!! And here is the finished product!
20 minutes are adding the glaze it has all ran off! So maybe my cake wasn't all the way cool! Who knows! But the cake tastes amazing! So maybe we will try again another day!!! 

I really considered notifying the Test Kitchen at Southern Living about the issues but I want to try again before I do that!! The point of my Epic Fail Pound Cake is that you should try try try again!!

Enjoy

B